
Google Analytics Tag Update to Global Site Tag
Another breakthrough for the web development community comes with the latest script to set up Google Analytics, the Global Site Tag (gtag). Remember that there are many benefits to incorporating Google Analytics into your SEO campaigns. If you continue reading this article, you will know more about what this new script offers. You can also learn quick and easy steps to update Google Analytics tag to the latest Global Site Tag.

Image Source: Freepik
The Global Site Tag
The Global Site Tag (or Gtag) is Google’s latest tag, which provides the easiest way to tag your web pages. In the long run, Gtag will replace all the other Google tags on your site and serve as one source to link them all.
In more technical terms, the Global Site Tag (gtag.js) is a JavaScript tagging framework and API that enables you to send event data to Google Analytics, Google Ads, Google Marketing Platform, Campaign Manager, Display & Video 360, and Search Ads 360. With the global site tag, you can manage multiple tags for different products.
As a general rule, the global snippet should appear at the top of every page on your site for it to successfully send event data. After adding the global snippet to every page of your site, you must configure it to work with each of your products. Use gtag() commands to help capture events and send data to one or more products (such as Google Analytics, Google Ads, Campaign Manager, Search Ads 360, and more). Lastly, after installing the tag, you must configure it to handle multiple configurations while using the same gtag.js framework.
Google Analytics (analytics.js) vs. Global Site Tag (gtag.js)
To compare, here are a few differences between the Google Analytics tag (analytics.js) and the latest Global Site Tag (gtag.js).
In terms of installation, you can only use analytics.js for Google Analytics. On the other hand, you can use gtag.js for other tools such as Google Ads, Google Tag Manager, and more. Moreover, when it comes to tracking, analytics.js uses trackers(ga(‘create’, ‘UA-XXXXX-Y’, ‘auto’);) to send pageviews to Google Analytics. Meanwhile, gtag.js sends pageviews to GA property identified by the GA_Tracking_ID(gtag(‘config’,’GA_Tracking_ID’)). Finally, in terms of use, you can utilize gtag.js for conversion tracking and remarketing purposes while you cannot with analytics.js.
If you wish to update Google Analytics Tag to the Global Site Tag, you can go through the instructions found in the following section of this article.
How to Update Google Analytics Tag to Global Site Tag
-
The first thing you need to do is register for Google Analytics (if you still haven’t). You can set it up for free!
Under Account Setup, enter your account details, starting with your Account Name. Take note that accounts can contain more than one tracking ID.
Under the Account Data Sharing Settings, it is recommended that you leave the following checked: Google Products & Services, Benchmarking, Technical Support, and Account Specialists to maximize your Google Analytics experience.
After that, you need to determine what you want to measure. For this step, select Web as your Tracker Option. Doing so will measure your website.
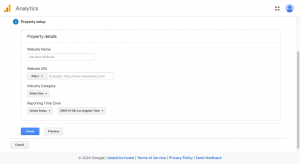
Then, under Property Setup, type in your property details such as your Website Name, Website URL, Industry Category, and Reporting Time Zone. After reviewing all of your entries, click the Create button.
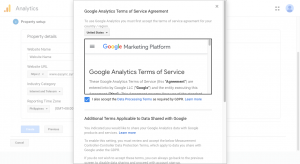
Lastly, you need to accept the Google Analytics Terms of Services Agreement.
-
After you have successfully registered your Google Analytics account, you will be redirected to your Tracking Code. It shows your Tracking ID and your Global Site Tag (gtag.js).
-
For the following step, you can insert the Tracking Code from the previous step via WordPress Plugin OR File Transfer Protocol (FTP).
Insert Tracking Code via WordPress Plugin
-
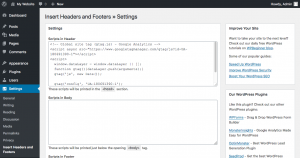
In your WordPress website admin dashboard, click the Plugin tab and search for the Insert Headers and Footers plugin. Click on Install and then Activate.
After successfully installing and activating the plugin, head to the admin dashboard and click on the Settings tab. You will be shown the Insert Headers and Footers settings. You can insert your new Google Tracking Code inside the Scripts in Header box then hit “Save”.
Insert Tracking Code via FTP
You can also insert your Tracking Code via File Transfer Protocol (FTP).
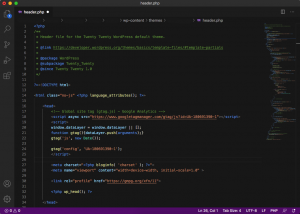
Insert the code immediately after the <HEAD> tag on every page of your website that you want to track. If you already have a Global Site Tag on your page, add the config line to your existing Global Site Tag. In the example below, we have “UA-180691390-1”. This config line indicates the ID of the Google Analytics property where you wish to send data. Click Save and then Upload.
Note: You need only one snippet per page. You can configure multiple products using a single global site tag.
Doing so enables the code snippet to load the gtag.js library, establish the Google Analytics property ID, and then send Google Analytics a pageview hit whenever a page is being loaded or reloaded in a browser. Pageviews is a metric that defines the total number of pages viewed.
-
The fourth step is to remove the old Google Analytics and Tag Code.
-
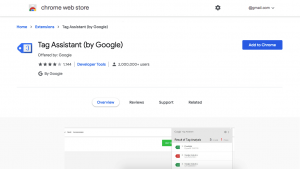
Lastly, you need to verify the tag installation. You can do this by installing the Google Tag Assistant Chrome Extension. Click Add to Chrome.
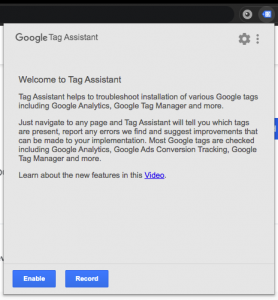
Then, after installation and before visiting your website, enable the Google Tag Assistant.
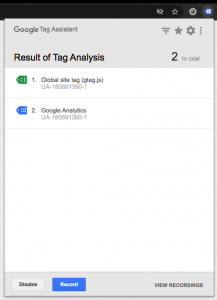
Finally, check the tag analysis result to verify if the Global Site Tag (gtag.js) and Google Analytics are successfully implemented.
Get the Latest Tag for Google Analytics Today!
Follow the steps mentioned above from web developers in the Philippines to update your Google Analytics tag to the Global Site Tag. Implement the Global Site Tag into all of your web pages for a more streamlined web tracking experience!






Comment 0